


Step 01

Wall preparation
American Clay must be applied over solid, well-bonded wall surfaces. Ninety percent of all wall surfaces will be new drywall with joint compound or old painted surfaces, requiring General Preparation (basic cleaning and masking).
A few other substrates will need a brown coat of structural plaster to level and/or strengthen the wall system (including cement block, straw bale, adobe, etc.). Some other surfaces are not suitable for American Clay application and must be remedied prior to plastering. Unsuitable substrates include: OSB, plywood, paneling, wallpaper, ceramic tile, and foam.
Step 02
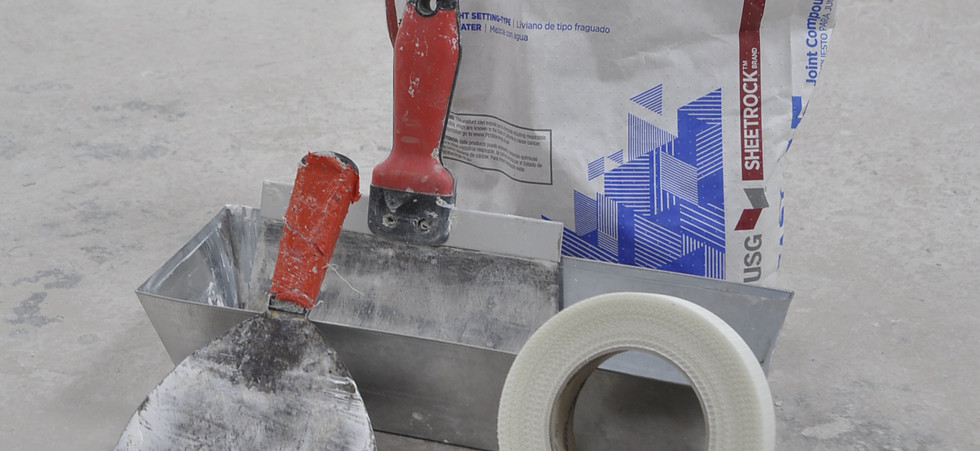
Joint compound & taping
To prepare new drywall, American Clay recommends using setting-type joint compound (also known as "hot mud") with mesh tape, to tape and bed drywall joints/seams. All purpose, pre-mixed joint compounds are not suitable. Examples of setting-type joint compounds are: "Durabond® 90" and "Sheeetrock® Easy Sand 45 (or 90) Minute Setting-type Joint Compound". Setting-type joint compounds come in a dry powder form and are mixed with water upon application. Finally, complete any necessary “General Prep” steps required to bring the substrate to a relatively flat, dust free, well-bonded surface.
Step 03
.avif)
Prime with a sanded primer
If you are starting your project from an old painted wall that doesn't need any repair, you can start from the primer stage. The surface must be dust free prior to proceeding to priming. Mix American Clay Primer Sand into an "approved" paint primer*. Prime the entire surface with a coat of this sanded primer. This step helps create tooth that aids American Clay plasters in properly adhering to the surface. The sanded primer will also help to even out any suction variations. Let primer dry completely.
Priming may be required for other applications, depending on your substrate. All painted surfaces, new drywall, gypsum plasters, cement finishes, and other sealed surfaces require priming. Please see Preparation section for more information.
Step 04

Mixing the plaster
Pour one gallon of water into a 5 gallon bucket. Add 1/3 bag plaster and mix using a spade handle 1/2” gear driven low-speed mixing drill and plaster paddle. At this stage you can add color pigment if desired. If using an Original plaster only: add the entire bag of Up & EZ! binder and mix completely; if using Forte plaster, you do not need the binder as it's already incorporated. Slowly add remaining plaster and more water to bring plaster to a soft-serve ice cream consistency. Total water content will vary between 2 to 2 1/2 gallons, possibly more, depending on humidity levels. Scrape the sides of bucket and continue mixing until all lumps disappear.
Let plaster sit for at least one hour prior to application (the longer it sits, the better it becomes). Original plasters may be mixed up to 30 days prior to application. Forté plasters should be mixed and applied within 3 days.
Step 05
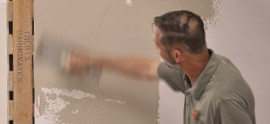
Apply the Base Coat of Plaster
Applying our plasters at the correct thickness is important to achieving a proper and durable finish. Applying the plaster too thick can lead to cracking and/or complete delamination from the surface. Applying the plaster too thin will leave the final finish brittle, causing it to be more prone to damage and making any repairs to the area difficult and more visible.
Using a hawk, trowel the material as evenly as possible. Apply plaster in vertical strips with irregular edges. Maintain a wet edge at all times and go from one edge of the wall to the other without breaking. Clean up all edges (around floors, ceilings, etc.) with a trowel to leave a finished edge. While spreading the plaster on the wall, the trowel will slowly move from a larger angle away from the wall to a shallow angle. During application the visual appearance of the surface can provide clues to proper thickness (like chatter and sand drags). Each of our plasters is applied at different thicknesses (please see guides for proper thickness and more details, also the plaster page ie. 'Loma' or 'Marittimo etc. will tell you how thick it should be applied).
Once you have achieved a reasonable surface, move to the next wall. Your base coat does not need to be perfect. You will need to achieve a more even finish, if desired, on your finish coat. The less you trowel the material across the surface the better: over-working can cause problems! Let your plaster dry completely prior to applying the finish coat. Drying time will vary between a couple hours to one day depending on air circulation, temperature and humidity. The plaster will visually let you know when it has dried completely. The original dark, wet look of the plaster will obviously fade to a lighter shade.
Step 06
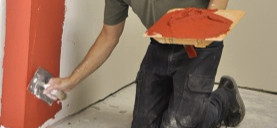
Apply the Finish Coat of Plaster
Begin by lightly wetting the surface prior to applying the finish plaster over the base coat. Misting the wall lightly prior to applying the second coat will give you more working time because it slows the plaster’s drying speed. There should not be drips or runs of water on your surface and the color should be splotchy and uneven -- over-wetting will cause problems! Follow the same application steps as the base coat, taking care to apply it more evenly if you desire a more refined look. Let your plaster dry completely prior to proceeding to compression.
Note: if using Enjarre, you do not need a second coat -- it is our only single coat plaster. Also, do not pre-wet the primed surface in a single coat plaster application.
You can adjust the texture of your surface after you have applied plaster to the wall if desired. While the plaster is still wet, you may create an evenly rough surface by rubbing the entire wall with a slightly damp tile sponge. This is perfect for a sand finish. This can be achieved by using varying circular-like strokes utilizing a slight amount of pressure.
Alternatively, you can create an evenly smooth finish by first completing the sponging steps described above. Next, you will want to trowel over the plaster. Use a light amount of pressure while keeping your trowel at a slight angle from the surface. The key is to trowel lightly because overworking the plaster will cause problems leading to cracking. Let your plaster dry completely prior to moving on to compression.
Step 07


Choose your finish
Compression is the final and most critical step in our application process. After the finish coat is completely dry, you must use one of the compression techniques in steps 7-A or 7-B. The compression step stabilizes the surface, prevents dusting, and helps to even out color variations in the plaster. This process also makes the finish surface repairable. Your compression choice will also effect your plaster surface’s final look and feel, so be sure to select the appropriate plaster and technique for the plaster finish you wish to achieve.

Step 07-A
Sponge Compression
Sponge compression can be completed on any of our plasters. If used on a smoother finish, the surface will become more matte. If used on a rougher finish, the surface will feel slightly rough. You will also need to brush any excess sand off the wall as you go with a brush or dry tile sponge. Sponge compression, especially on a smoother surface, also tends to bring out the “sparkle” of the sand aggregates.
Rub the surface with a tile sponge using varying circular-like strokes utilizing a slight amount of pressure. The tile sponge should be damp, not dripping with water. As you move across the wall, the tile sponge will become dry and will begin to accumulate pigment on the surface. Simply, dip your sponge into a bucket of water and wring it out before resuming compression. The final surface should be stable and not sandy or dusty when you finish.
Step 07-B
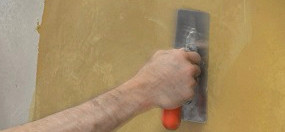
Trowel Compression
Hard trowel compression can be completed on any of our plasters. Lightly mist the plaster so the surface is fully damp (no dry spots remain) but water is not running down the wall. Using a stainless steel or Lexan plastic trowel, trowel the surface using small, half-moon type motions. Your trowel should be at a slight angle off the surface, not completely flat. The trowel should glide across the plaster and no scratching sounds should be audible. If scratching from the trowel is heard, the wall is too dry, re-mist before continuing.
Mist and repeat as needed until you have completed compression on the entire wall. Working in a 2'x2' section or smaller is recommended. The wall should feel smooth to the touch after troweling.
Step 08

Clean-up and storage
All cleanup can be achieved with warm water for plaster that is dry or wet. Carefully clean your trowels with a brush. Trowels can have edges as sharp as knives and can cause injury. If using a sponge to clean your tools, do so gently. Sanded primer on surfaces and tools must be cleaned when still wet. When working with darker colors, especially reds, allow the plaster to dry first, then rub or scrape off as much plaster as possible. Then finish cleanup with a damp sponge. If pigment stains any surface clean up can be achieved with white vinegar.
Once your project is complete and/or you are ready to store remaining plaster, spread the plaster onto a sheet of plastic or cardboard. The thinner the plaster is, the faster it will dry out. Place the material into sunlight to expedite the process. Once dry, break into small pieces and store in a plastic bag or container. Clearly label the space for which the plaster was used, the plaster type, color, and batch dates of the pigment(s) used. This information may come in handy if you need additional material in the future.
This material may be rehydrated with water for touchups and repairs in the future.

Repairs and Maintenance
One of the unique aspects of American Clay plasters is the repairability of the final wall surface. Because our plasters do not have a chemical set (like other lime, cement, or gypsum based plasters), the plaster can be rehydrated and repaired with a few simple steps.
There is also no waste; excess plaster from the original application can and should be dried out for future repair use. This helps to ensure the color and texture of the repair matches the original plaster finish. Repair processes vary, please see video tutorial for more details and guidelines.
Below are two helpful on-the-go guides to maintaining and repairing your American Clay walls:
Bondo Spreaders: Link | Link | Link